Your cart is currently empty!


Filing cabinets can bring down the visual of your home office. That’s why today, at Katie T’s Home, I will share this rustic filing cabinet makeover tutorial! I know I’m a little biased on this one (because this is a project I did myself). But I have a lot of helpful information to share. When I took this project on, I made A LOT of mistakes. Things weren’t going as planned, and the materials I used weren’t working as I wanted them to.
Because I ran into all those issues, I switched gears to plans B, C, D, etc., to work around the problems I was facing. Everything worked out because I ended up with a far better metal filing cabinet makeover than what I set out to do. So, let me share the tips and tricks I discovered along the way!
This post may contain affiliate links, which means I’ll receive a small commission if you purchase through my links, at no extra cost to you. Please read the full disclosure for more information.
Get all my favorite digital downloads today!
Updated: September 24th, 2024
I also ask that you please leave your thoughts in the comment section below. I’m always trying to produce helpful content for my readers, and without knowing what you think, it’s hard to know what you find helpful/not helpful. So please leave your thoughts below!! 🙂
For my 38th fun fact, I want to share that I’m not a fan of pumpkin flavors. I wish I liked it more because it’s a favorite in the New England area during fall, but it’s just not my cup of tea.
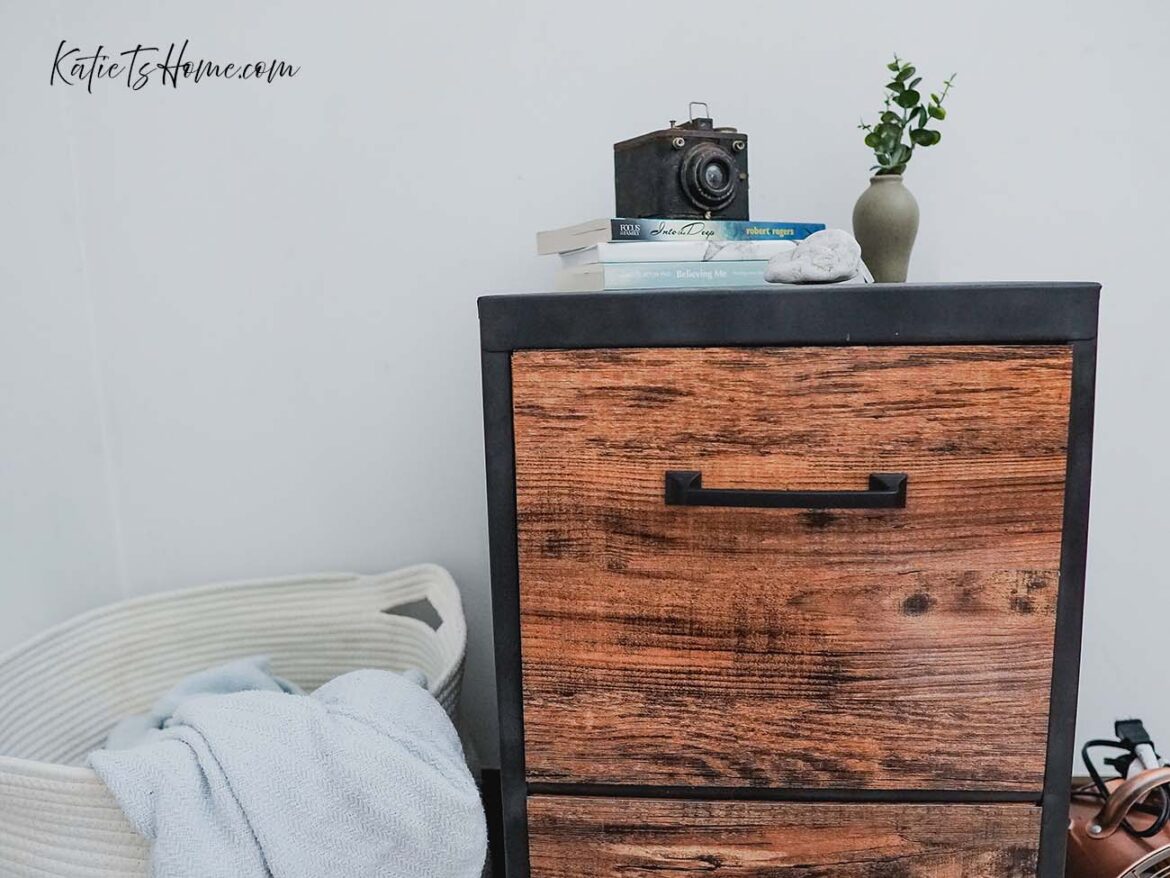
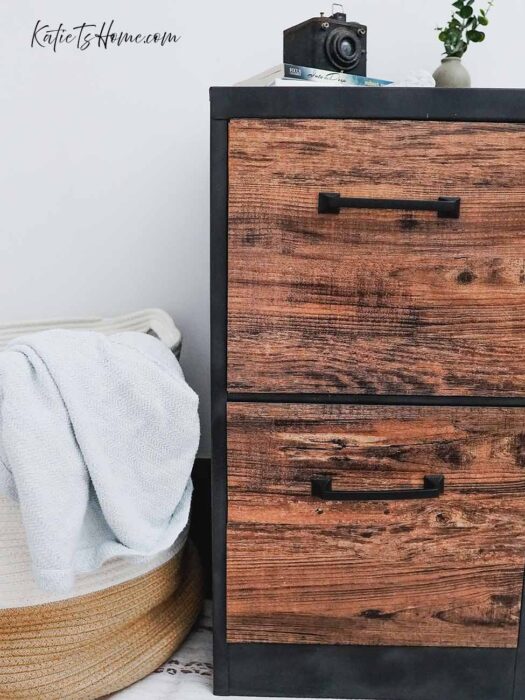
So, to jump right into this rustic filing cabinet tutorial, you should understand why this cabinet makeover is so great.
The first reason is the worn look of the black metal. I anticipate that the paint on this product will chip and scratch with time.
The second reason is that I used vinyl floor planking on the face of the cabinet. The floor planking looks better than the contact paper vinyl. It’s also a LOT easier to install, which I will go into more depth about later in this post.
Note: if you plan on tackling a similar project, please read this entire article. Not only did I make plenty of mistakes getting the filing cabinet to look good, but there are things I would have done differently. So be sure to read all the tips and tricks carefully so you don’t face the same problems I did!
This tip seems like a no-brainer, but when it comes to your rustic metal filing cabinet diy, it’s so true!
My filing cabinet had recessed handles, so the whole face of the cabinet was flat except for that indentation. I decided that I could attach a plank of wood over it to give a farmhouse door look. I used wood from a leftover pallet to save money on this DIY project.

After I measured what I needed, I cut the pallet to the appropriate length. When I placed it on the face of the filing cabinet drawer, it looked terrible. I played around with it to see if I could make it look good, but the wood was too thick.
After wasting time and thinking about ways to use wood for this project, I decided to move on. I scrapped that idea and came up with what I thought was better.
When I scrapped the wood pallet idea, I remembered I had some vinyl contact paper with a wooden pattern that would look great on the face of the drawers. At this point, I decided I would paint the rest of the cabinet matte black. I used this spray paint because it’s made for metal.
Originally, I was going to paint the base of the cabinet white for this rustic metal filing cabinet DIY because I am a sucker for the white look. But I decided that black would look better in this application. Especially comparing it to the original vinyl, the black just looked better.
Before you spray paint or apply anything, make sure you thoroughly clean your filing cabinet. I used dawn soap and scrubbed it down with this sponge. The green side of the sponge was perfect for scratching the original paint job. I wanted to sand the original paint so that the new paint could adhere to the metal better.
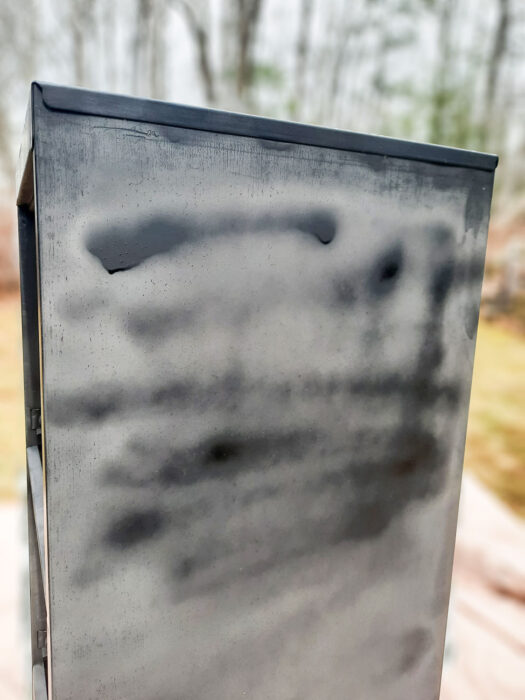
After I cleaned the cabinet, I spray-painted the base. I was not too worried about getting the coat even (as you can see from the hack job in the image). I knew I would be sanding it after, so if anything, the splotchy areas added to the worn look.
As the base of the metal filing cabinet was drying, I worked on the drawers. Because the drawers had recessed handles, I had to fill them, so the face of the drawer was flat.
Next came the vinyl. I applied the vinyl to the face of the metal filing cabinet drawer. This step was the most frustrating part of the process. It would not stick, no matter how much I sanded the back side of the drawer to wrap the vinyl around. I used two different types of glue, including Loctite, but both were not working.
At this point, I decided that the glue might not be working because it needs pressure while drying. I tried clipping the area I was working on, but the clips kept sliding off because of the angle of the edges.
I finally decided to take masking tape and tape the edges.
I also added vinyl to the top of the metal filing cabinet because I liked the look of the wood. You will soon find out why I did not end up keeping it.

Get all digital downloads for a fraction of the price with this bundle deal!
At this point in my rustic filing cabinet makeover journey, some time passed due to the weather. I wanted to work on this project outside, and my area was experiencing some snow, so I waited until warmer weather.
Once it became nice again, I found the time to finish the project. Unfortunately, I ran into some problems. The first problem was the vinyl developed air pockets underneath. I spread them out the best I could, but it was still noticeable.
After having experienced that, I can confidently say that I would not recommend vinyl contact paper on a metal filing cabinet. The air pockets could have developed because I left it outside on my screened-in porch. So, I do not know if the cold had something to do with it, but I would hate to put all the work in with the same results.
I removed the top vinyl piece because I prefer a worn look to the vinyl filled with air pockets.
I started to prepare the area for the drawer hardware. I bought this hardware for another project and had some leftovers, so it came in handy for this application.

I attempted to drill the hole towards the center of the drawer over the recessed handle. If you do this step, be sure you have the proper bits for your drill. I have this bit kit that includes bits meant for metal. I also recommend that you go slow when drilling into the metal.
As I drilled into the face of the drawer, I noticed it was not going in. I investigated and found I was drilling directly over the thick piece of metal for the recessed handle. It was too thick to continue.
At this point in the project, I was so discouraged. The drill left a hole in the vinyl and a dent in the metal.
Even if I wanted to redo the vinyl on the whole drawer again, I would have to wait because I did not have enough left to do the face of the drawer.
Then it came to me. I bought vinyl flooring planks a while ago for a different project that never happened. I hunted down the planking in a back closet and got to work.
I decided to keep the vinyl sheets on the face of the drawers because the floor planking seemed to adhere to it better than the straight metal. With that said, if you plan on giving your filing cabinet a similar makeover, I recommend buying glue proven to adhere to metal and putting this on the whole face of the drawer. Doing so will help the planking stick to the metal.
After I placed the planking down, I got the drill out again. This time, I planned on putting the hardware closer to the top of the drawer. I managed to do this rather quickly.
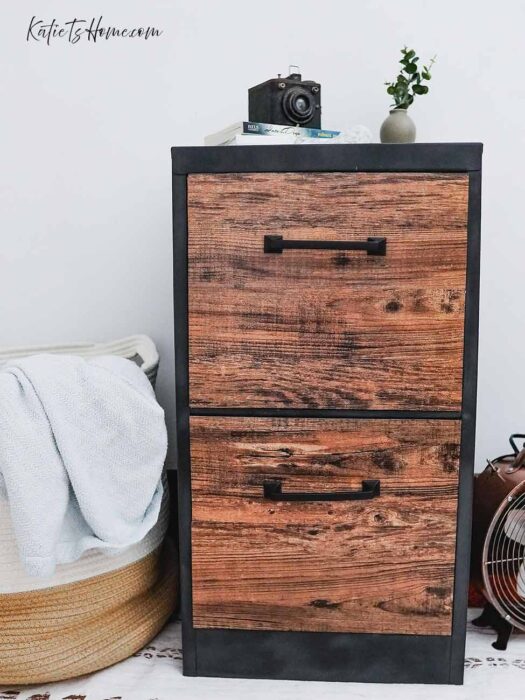
Just like that, my metal filing cabinet was finally finished! I hope you have some useful tips and tricks on what to do and what not to do. Let me know if you agree that doing it the way I did is the best cabinet makeover idea! Comment below or reach out if you have any questions.

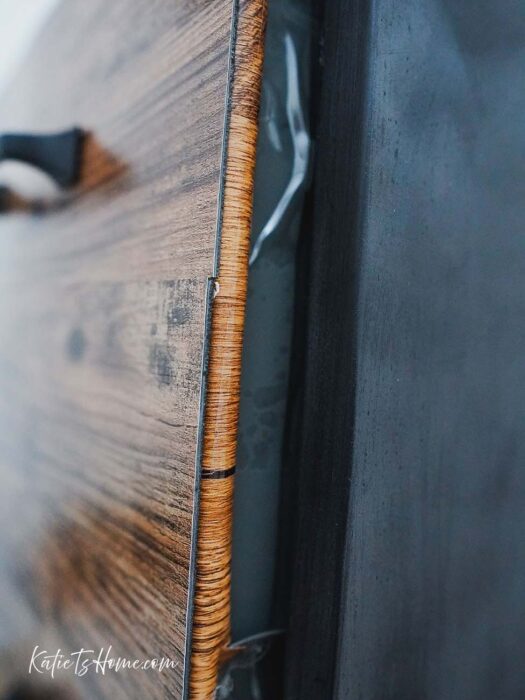
What did you do about the raw edges on the sides, top, bottom, of the vinyl wood planks on each of the drawer fronts? Can we see those, please?
Hi Jane! There is a picture of the side profile (it is zoomed in, it’s the 2nd photo under the section “mistake #2: Vinyl contact paper”) Because the vinyl planks are thicker (compared to the contact paper), there is not much wiggle room to wrap it beyond the drawer. I stuck mine right on top of the contact paper because I didn’t see a need to remove it, although you do not need to add contact paper to your project. Depending on the filing cabinet your working with, if the drawers sit a little inward, you won’t even notice the planks when the drawers are shut because at that point it would be flush with the frame of the cabinet. You will however notice the edges once you open the drawers. Might not be for everyone so do what you think is best! Hope this helps 🙂
What did you use to fill where the handles were to make it flat?
Admittedly paper towels 😅. If I were to do it over again I think I would test some kind of putty/spackle to see if it would work
Leave a Reply