Your cart is currently empty!


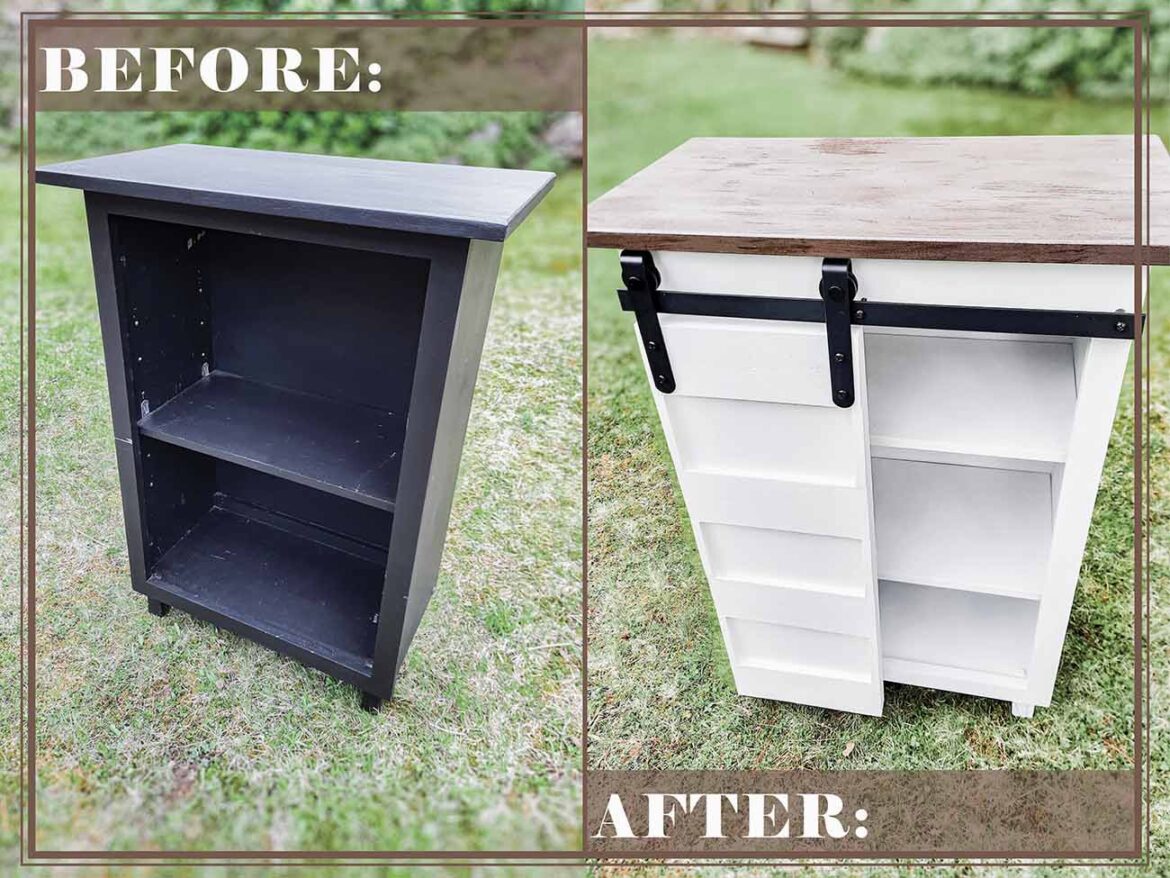
Hey there! Looking for some tips on how to transform your bookcase on a budget? Well, you’re in luck! I will walk you through how to transform your bookcase with this DIY bookshelf makeover idea! So, let’s jump in!
This post may contain affiliate links, which means I’ll receive a small commission if you purchase through my links, at no extra cost to you. Please read the full disclosure for more information.

Get all my favorite digital downloads today!
My husband and I had this bookcase hiding in our closet for the longest time! Recently, I repurposed a metal filing cabinet (you can read about it here), enabling me to move some paperwork around.
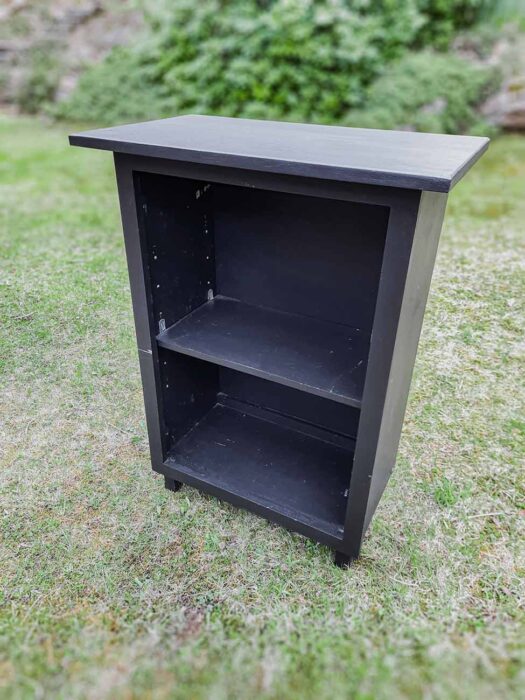
Because the metal filing cabinet is now holding our paperwork, it freed up some space in my desk. I decided to move the books into the desk and repurpose the bookcase.
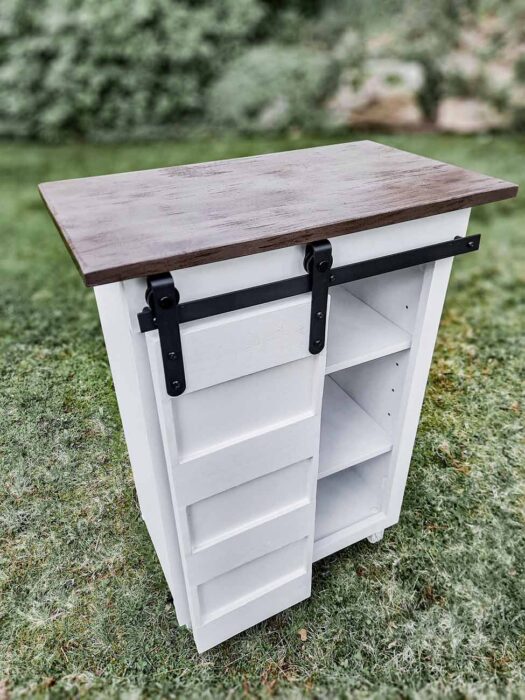
My goal for repurposing this bookshelf is to turn it into a coffee station! I am hands down, a coffee snob. With my personality type, it is fitting to have a designated coffee station.
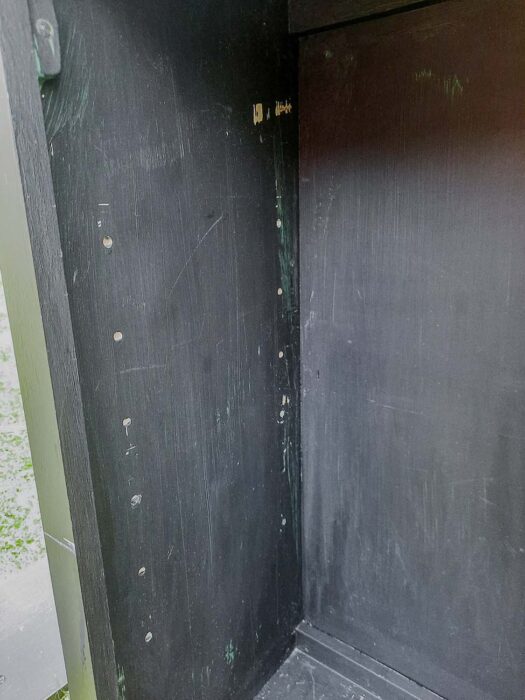
To transform your bookcase from old to new, you need to start off by filling in any holes or dents. I had a few dents in mine so, I used spackle (also known as putty) for this.
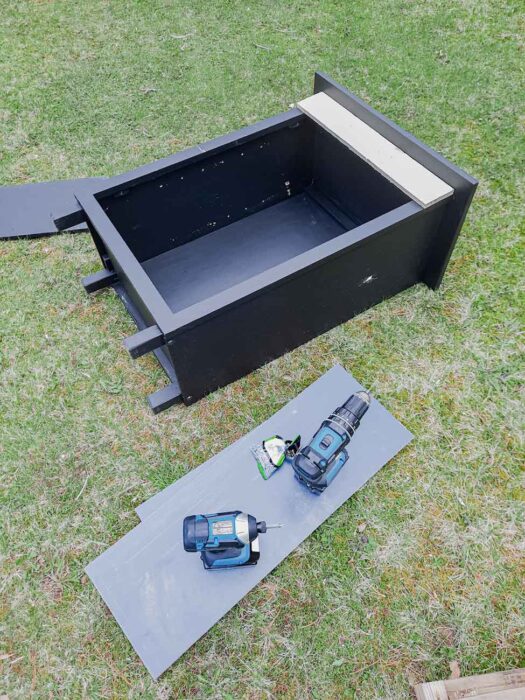
While drying, I cut wood for the top of the bookshelf. I screwed the piece of wood to the top of the bookcase to give the hardware enough room to slide across.
Depending on your bookshelf, you might not need to do the step above. Be sure to measure the farmhouse hardware to see how much room it needs to slide. Mine needed about 3”.
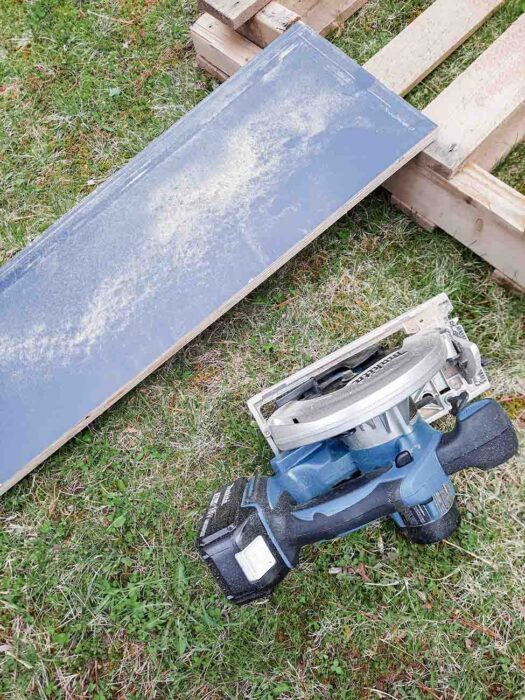
Next came the door, which in my opinion, makes the bookshelf look so good! For this piece, I cut a scrap piece of cabinet-grade plywood.
I want to note here that when you cut the dimensions for your door, be sure to factor in the farmhouse hardware. When I cut my door, I didn’t have all the hardware and forgot to account for the extra space on top. In my case, I don’t mind the extra-long door, but if you want the door to be exact, make sure you factor in the height of the hardware.
Another important thing to consider is the thickness of the door. For my farmhouse hardware, I didn’t want to go any larger than 1 ¼” thick. Luckily, the plywood was 1” thick, and the scrap piece of wood on top was ¼” thick.
So, after I cut the base of the door, I measured what I needed for the pieces to go on top. Because the door is so narrow, I didn’t want the traditional farmhouse design. I feel like it would have made the door look too small.
Instead, I cut out scrap pieces of wood for the horizontals. For the verticals, I used this craft wood that I bought for a different project that never happened. It ended up being exactly what I needed.
Consider adding a drawer handle if it works on the design of your farmhouse door. There is no good place to put one on my door, so I will not be adding one.
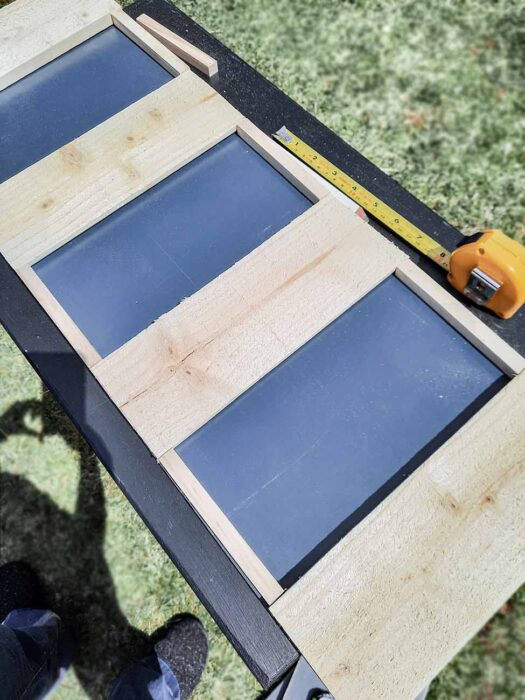
Finally, once I had everything cut, I put the smaller pieces of wood on the plywood to be sure everything fits together. Then, I sanded everything down. I put the pieces back and glued them down using wood glue.
After I assembled the door, I lightly sanded the bookcase.

Get all digital downloads for a fraction of the price with this bundle deal!
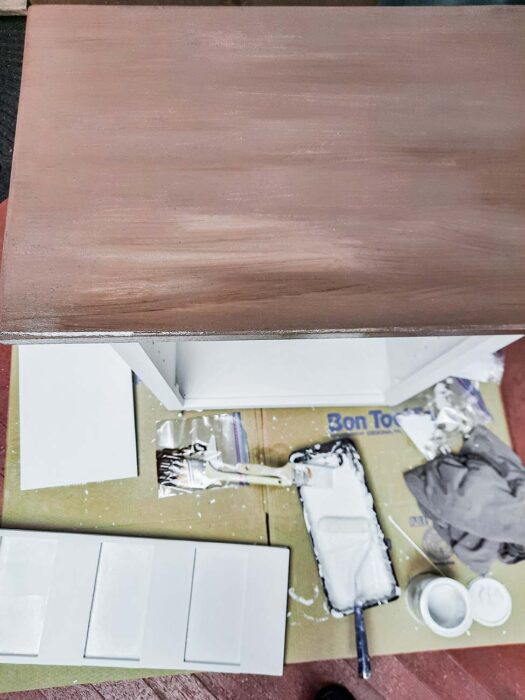
Now comes the painting part to transform your bookcase! I chose white chalk paint because I wanted something that would adhere to stain. It’s a LOT of work to completely remove stain. I did some research and discovered chalk paint was the way to go.
This paint is on the thicker side, and I had to put on three coats! I went through a good amount of the can! I also used a paint roller because I didn’t want brush strokes from a paintbrush. However, I recommend painting the top part with a paintbrush if you plan on staining the top. I’ll explain more about this in the next step.
Next comes the staining part. I chose to work with gel stain for a couple of reasons. One, I wanted something that could adhere to the paint. Two, I liked the concept of the gel enhancing the brushstrokes to look like wood.
Having used the gel stain for the first time, I have some feedback that I want to share with you before you do this process.
First and foremost, a gel stain is a thick stain meant to highlight texture to make it look like wood. I can’t speak for all gel stains, but the one I used is very thick.
Next, make sure you paint the top part with a paintbrush. I used a paint roller, not knowing that the base coat mattered as much as it did.
This next piece of information has to do with the color of the stain itself. My goal for this piece was a lighter brown. After looking at reviews and photos of what other people did, I decided it was the color I wanted. After putting on the first coat, I realized I was wrong, and there are a few reasons.
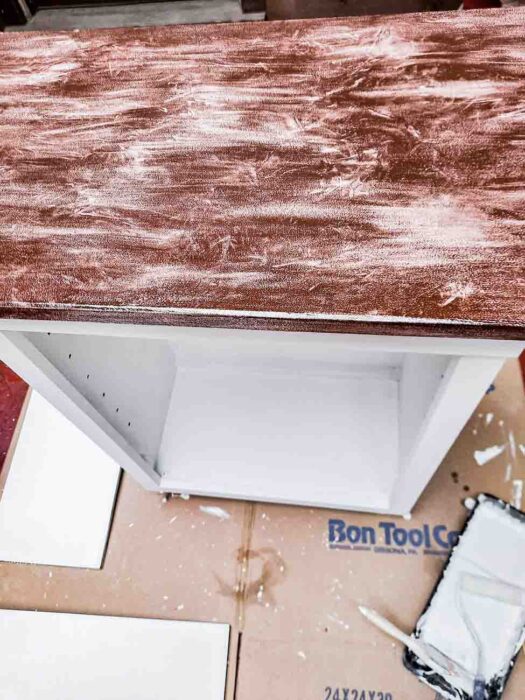
So, when I did the first coat over the white paint, I noticed that the stain had purple undertones which is not what I wanted. I couldn’t get a picture to show the purple undertones, but the image below shows the first layer of stain.
The reason why it had purple undertones all boil down to color combination. Brown is a composition of opposite colors. So, for example, if you mix orange and blue together, you get brown.
It’s like black, which is an equal ratio of the primary colors, blue, red, and yellow. To get the opposite color of blue, you must mix red and yellow to make orange. So essentially, brown is the same makeup as black, but the ratio is different.
Because the stain I used was heavy on the purple undertones, that means they used a combination of purple and yellow. So instead of using a different stain, I diluted the purple undertones by adding yellow acrylic paint.
I mixed yellow acrylic paint with the stain in a separate container and got the exact color I wanted!! The only callout here is that the acrylic paint thins out the gel paint. I was okay with this because it allowed me to use the brush and get the brush strokes for the added texture.
If you add acrylic paint to your stain, don’t thoroughly mix it. I mixed it just enough, and it was perfect because it gave a slight variation in the tones on the base layer. This made it look more realistic. I have since used this technique on my headboard as well. You can read about my farmhouse bookshelf headboard here.
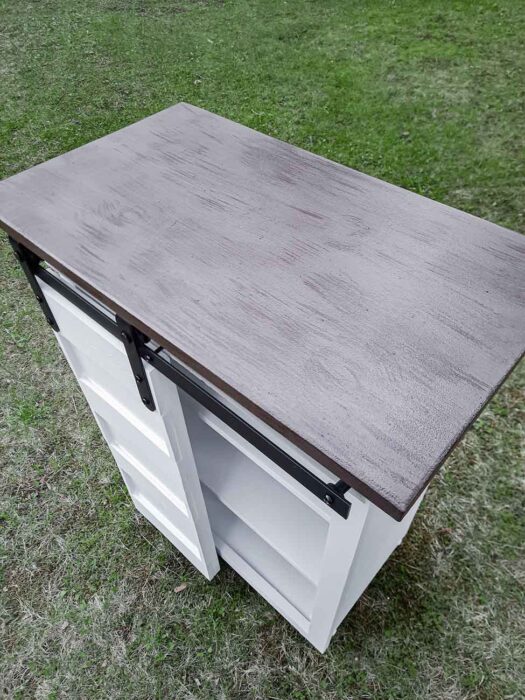
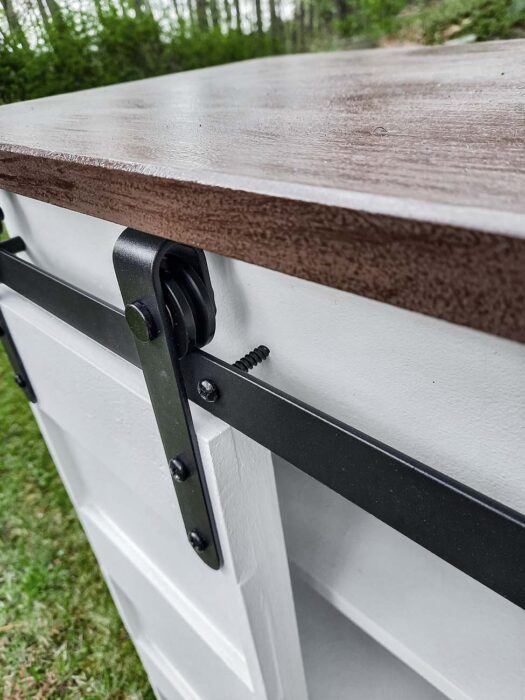
After that layer dried, I took a dry brush and lightly dipped the tip of the bristles in the original gel paint. I lightly brushed it on the top of the bookshelf to make it look like wood grain. After I did this a few times, drying the paintbrush off in between, I added character by going in the opposite direction and giving the grain a curvature in some areas.

The final step to transform your bookcase is to add the hardware! The smallest rod for this type of hardware that I could find was 2ft. My bookshelf was just under that, so I had to find a way to extend the bookshelf or make the rod shorter.
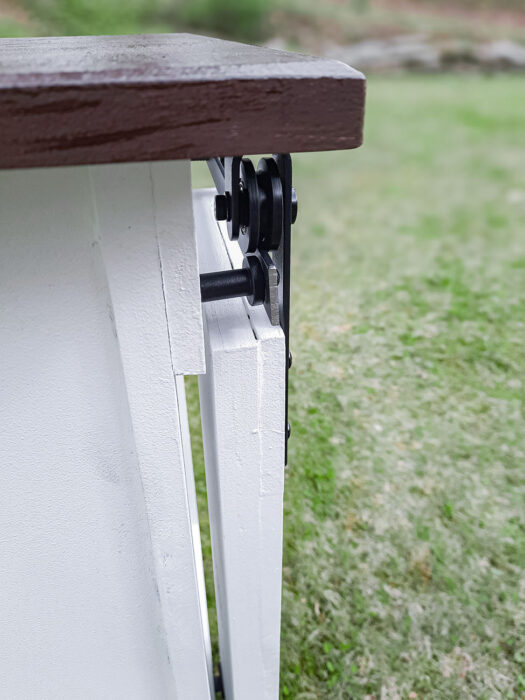
Luckily for me, my brother has a hacksaw with a metal blade that can cut through metal. This is why I didn’t have the piece with me when I was doing the measurements for the door. My brother was nice enough to cut the piece for me back at his house.
So, after my brother cut the piece for me, I screwed it into the bookcase. Also, if you screw the centerpiece in as well, the door can’t move past it. I wanted my door to fully extend side to side, so I removed the metal covering from the screw. I decided that the aesthetic wasn’t worth the door not being able to fully shift from either side.
So, there you have it! Hope my step-by-step guide on how to transform your bookcase with this DIY bookshelf makeover idea is helpful! Please comment below or reach out with any questions 😊 I would love to hear from you!

[…] area. Recently I refurbished a bookshelf to make it into a coffee station. You can read about it here. Now comes the fun part. Decorating the coffee bar! So, without further ado, I will give you 5 […]
[…] with yellow and white acrylic paint. I did a similar process to a bookshelf (you can read about it here). I loved how the bookshelf came out, so I wanted to do a similar […]
Leave a Reply