Your cart is currently empty!


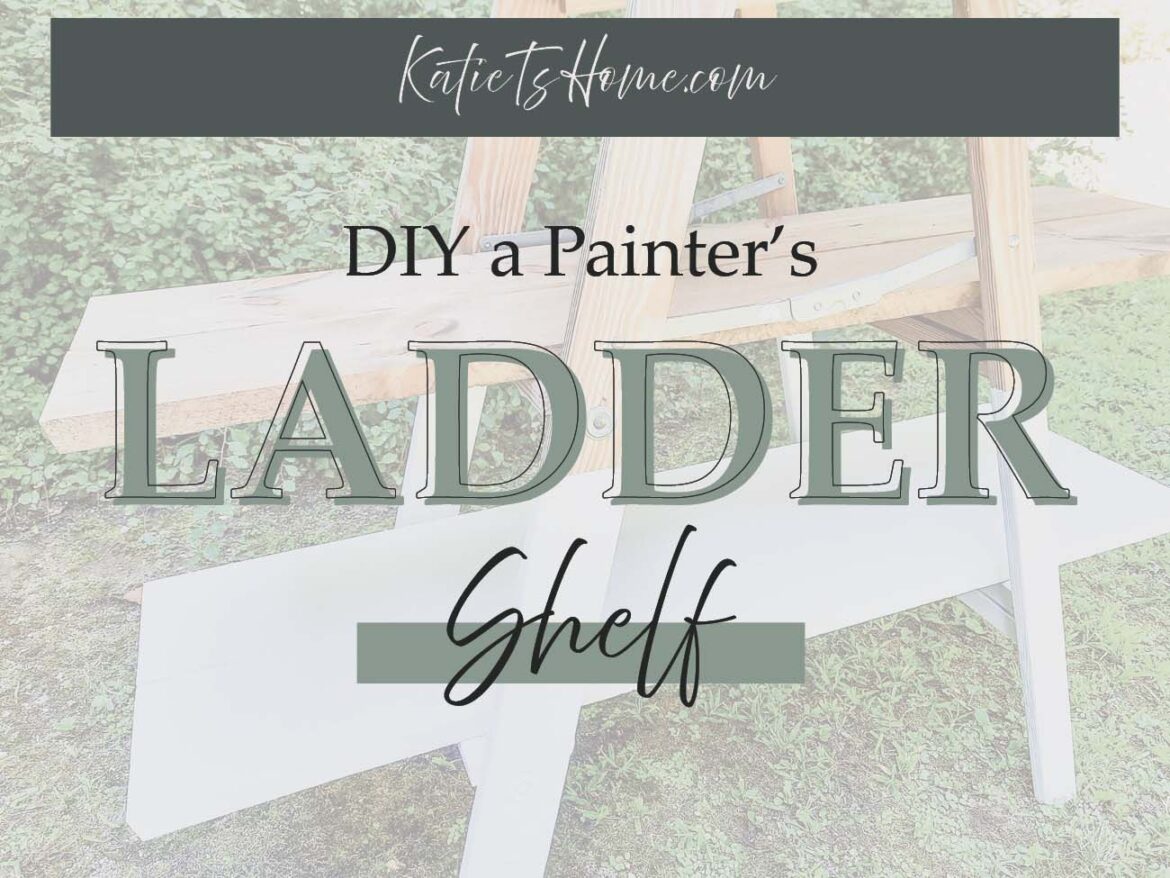
How to build a DIY ladder shelf to fit a painter’s ladder couldn’t be any simpler with these tips and tricks from Katie T’s Home! Not only do we use free materials to make the shelves but we also add white paint to the base to give the ladder that rustic farmhouse look without the added excessive texture from the wood grain. So, if you feel like your decorative ladder is suffering from the same “excessive texture” or even cluttered feeling then you’re in luck! I’m about to walk you through how to upgrade your decorative ladder with these simple tips and tricks to help avoid the clutter feeling. So let’s dive in!
This post may contain affiliate links, which means I’ll receive a small commission if you purchase through my links, at no extra cost to you. Please read the full disclosure for more information.

Get all my favorite digital downloads today!
Updated: March 6, 2024
I also ask that you please leave your thoughts in the comment section below. I’m always trying to produce helpful content for my readers, and without knowing what you think, it’s hard to know what you find helpful/not helpful. So please leave your thoughts below!! 🙂
Fun fact time! This is a new section I’m including on my blog posts so my readers can get to know me on a personal level!
So, for my 19th fun fact, I want to share that I live in Massachusetts
I would never move far away because I like being near family and friends. Plus, I love the 4 seasons (contrary to a lot of other people).
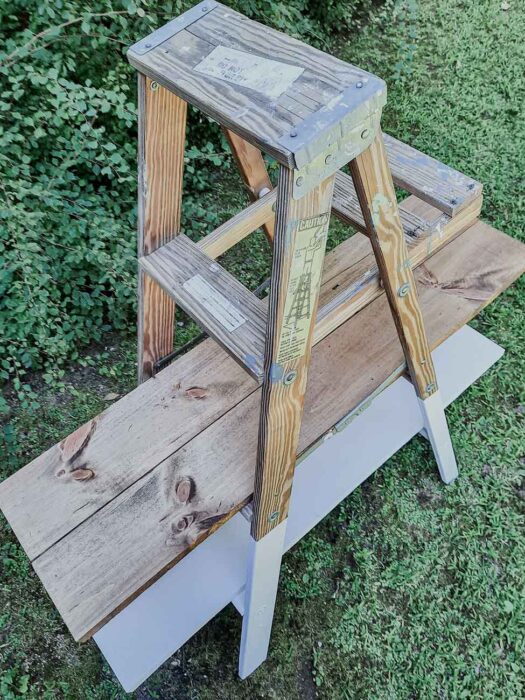
The reason your decorative ladder is feeling cluttered is quite simple. As you can see in my decorative ladder, before upgrading it, it just felt overwhelming.
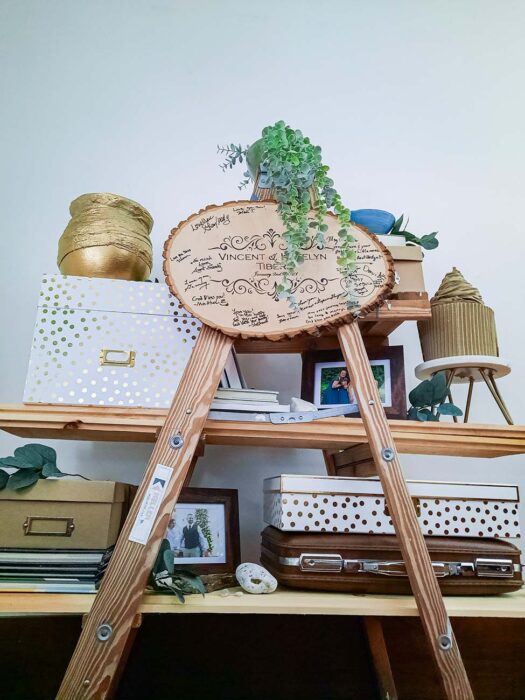
It took me a while to decorate this because the decorations felt crowded even though there was enough space between everything.
So what is it then? Well, it’s the “big picture”. And what I mean by that is even though I don’t have an overwhelming amount of decorations on the decorative ladder, the visual appeal, as a whole, seems a bit much.
So I had two options. Reduce the amount of décor or change something on the ladder.
As you can see, I went with the latter (see what I did there, lol!) and decided to upgrade the ladder and the display shelves.
Now, in case you are wondering what the final decorated ladder looks like, you can check out my final post here! I’m not gonna lie, it came out so good!
So the question is, why does it look less cluttered? Because I removed one of the factors in the equation. The excess textures, in other words, the grain on the ladder.
The ladder has a beautiful grain to it. However, this grain is visually overstimulating because there’s a lot of it. This overstimulation is driving the cluttered feeling.
It’s no different than decorating your home. Have you ever noticed decorating a room with excess features like textured walls, contrasting wood grain on the mantle, or even an intricate carpet pattern is more challenging compared to a simple room?
So, to make this easy for you, below are helpful tips and tricks to upgrade your décor ladder in a few simple steps.

Get all digital downloads for a fraction of the price with this bundle deal!
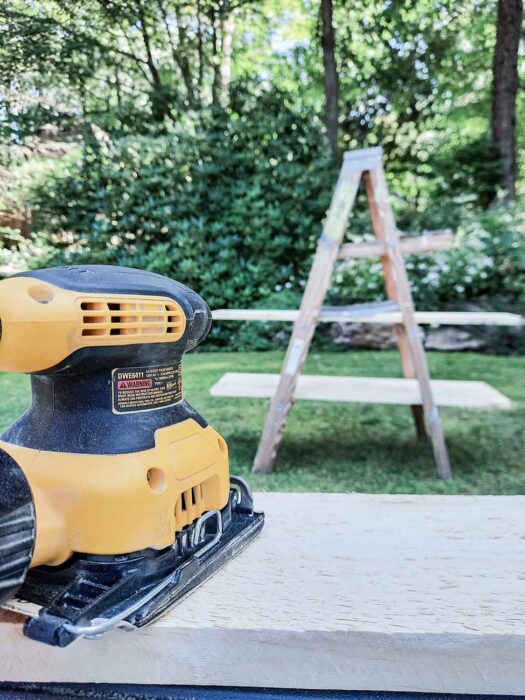
So, first and foremost, do yourself a favor and don’t make the shelves too long. Before I ended up with these scrap pieces of shiplap I was using much longer boards.
They were far too large! As a result, I kept adding décor to fill the void, which only added to the busyness.
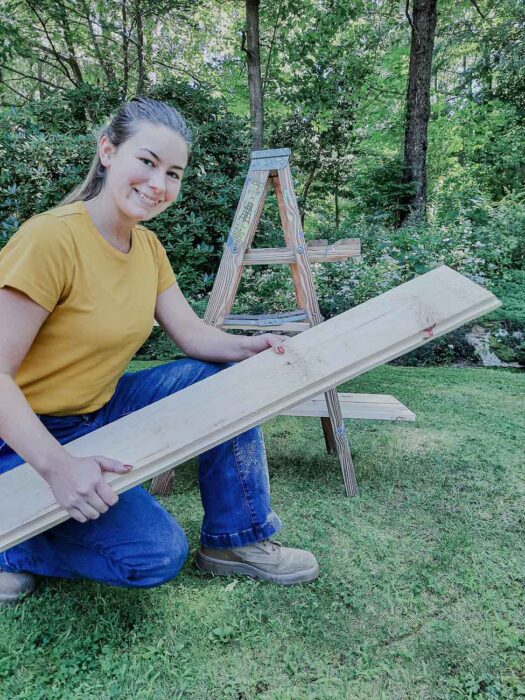
So, to make it easy for you, I wouldn’t have the display shelves any longer than the ladder height.
Now, there are some exceptions to this rule. But overall, if you’re striving for a similar look to mine, then apply this rule. My shelves are a few inches shorter than the ladder height, and I think it’s the perfect length.
I also got these shiplap boards for FREE! Thanks to my brother who is in the trades and comes across materials that are perfect for frugal DIYers like myself. I discuss more of how to get materials for free in the article above.
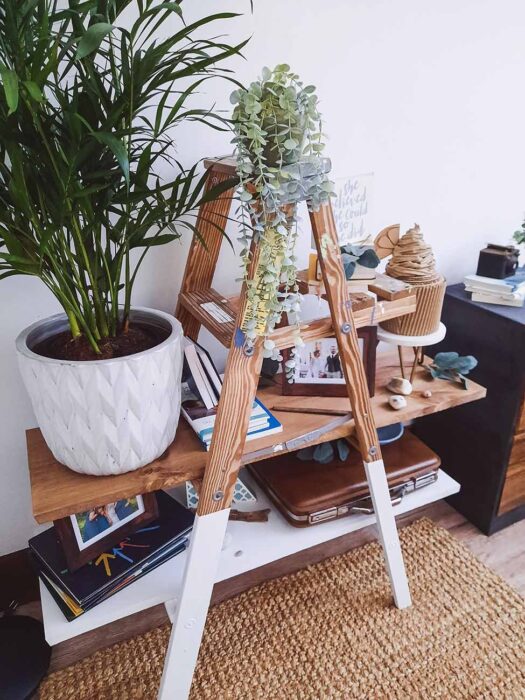
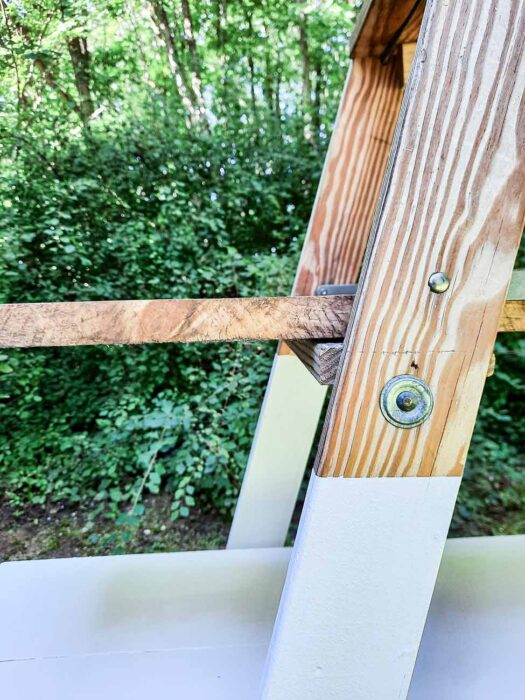
I wanted there to be some original ladder showing. It doesn’t do me any good to paint the whole thing white when the point of getting a painter’s ladder was to showcase the painter’s ladder.
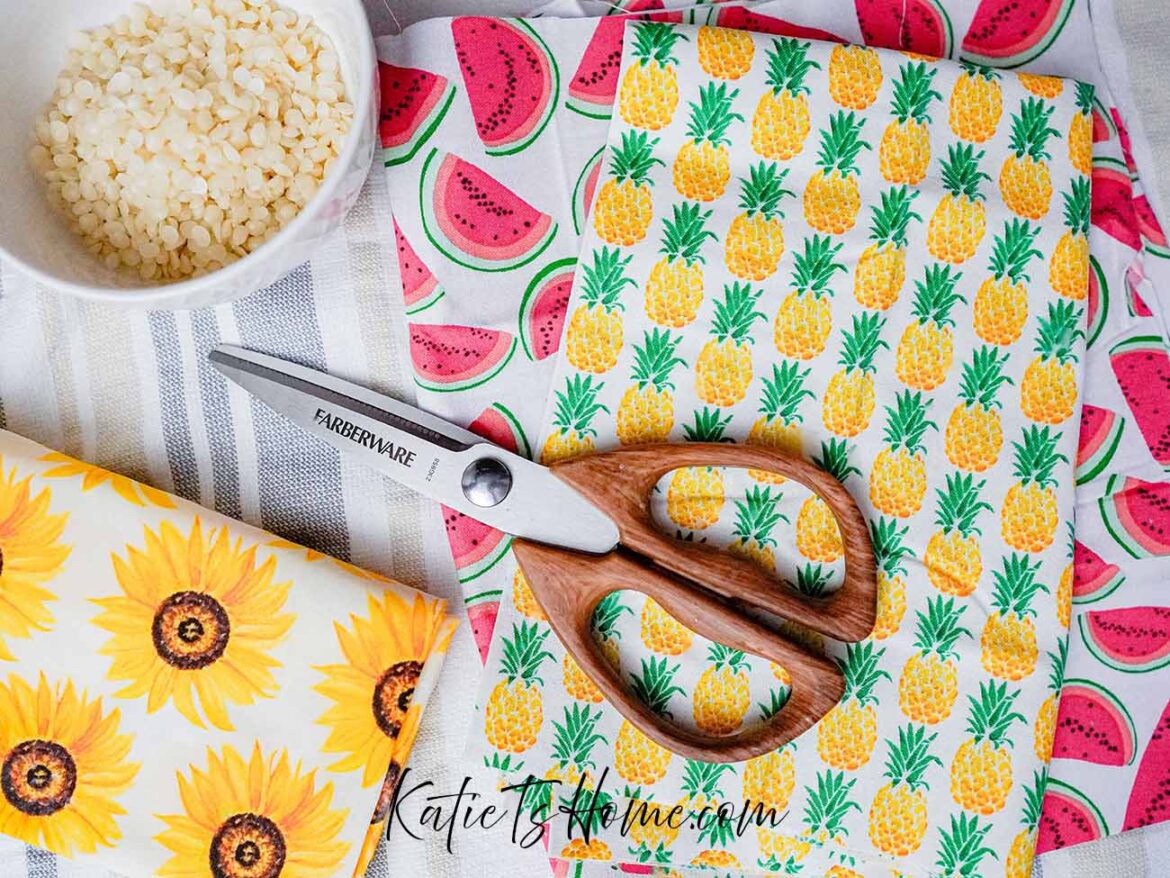
So, that meant one of the shelves needed some stain to match the color of the ladder.
I go into more detail on color theory and how to use the knowledge and apply it to matching stains/paints in the article below. But for now, I’ll explain a high-level overview of how I did it for this project.
First, I took special walnut stain and diluted it with mineral spirits. If you do this, I highly recommend using a stain that you have used in the past. This way, you already have an idea of what to expect from the color.
Start on the safe side like underneath the shelf or on a scrap piece of the same type of wood. Use more mineral spirits to dilute the color of the stain.
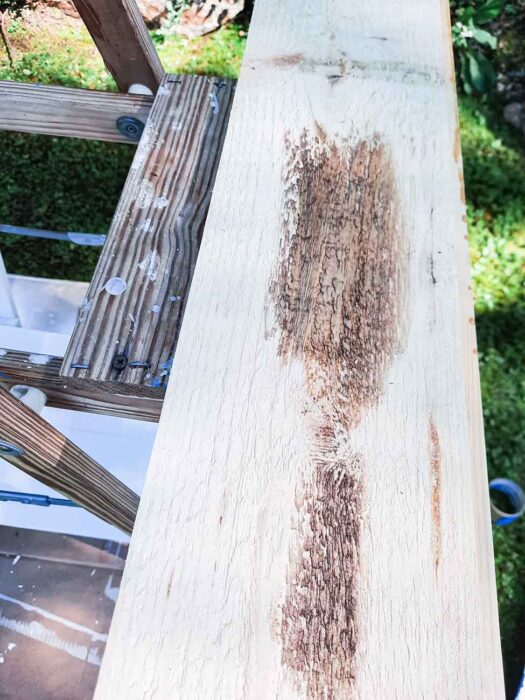
After the initial test, I gradually added more stain until the color came close. You can even add a different color stain to the mixture. Just be sure not to mix oil-based stains with water-based stains. I added briarsmoke to get the perfect grayish undertones.
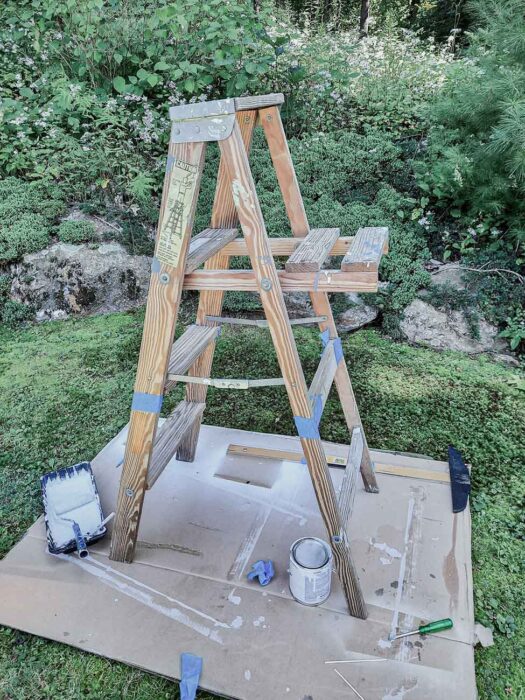
So, the last part of this upgrade is to paint the bottom section of the ladder. This was the big leap between the ladder décor looking far too extreme with the wood grain to what it is now.
And again, the point of painting it was to remove the equation of the overstimulation from the grain of the ladder.
A helpful tip to keep in mind is to use good masking tape.
Also, when you are looking to apply the masking tape, it’s easiest to get a long level measuring tool, or in my case, a makeshift one with a long straight edge and painter’s tape!
So there you have it! You know how to upgrade your decorative ladder with these simple tips and tricks! I’m so excited to share the final piece of resistance with all of you, so stay tuned! Reach out if you have any questions, and comment below if you are thinking about upgrading your décor ladder as I did!

Leave a Reply