Your cart is currently empty!


Hello! I hope you are all having a wonderful day! Today, I will walk you through my DIY vintage oil lamp upgrade in 3 simple steps! It’s an easy DIY project and you can use this process on other old items besides vintage lamps! For example, if you have an old jar, vase, or candle stand, you can paint it with the same textured paint! And be sure to read the last tip on how to paint the old lamp with textured paint! It’s a good one!
So, without further ado, let’s jump in!
This post may contain affiliate links, which means I’ll receive a small commission if you purchase through my links, at no extra cost to you. Please read the full disclosure for more information.

Get all my favorite digital downloads today!
I also ask that you please leave your thoughts in the comment section below. I’m always trying to produce helpful content for my readers, and without knowing what you think, it’s hard to know what you find helpful/not helpful. So please leave your thoughts below!! 🙂
First, you’ll want to clean the oil lamp. Then take the lamp apart by starting with the glass shade. It should easily slide off of the base. Next, you’ll need to unscrew the piece that holds the wick.
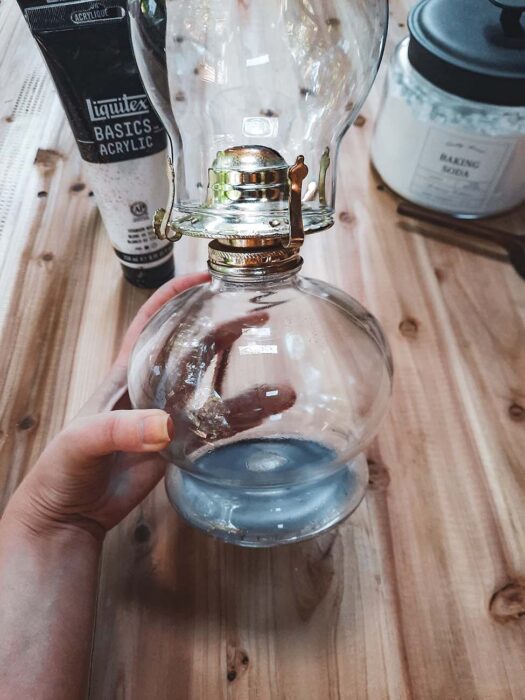
Once the antique lamp is apart, pour the oil into a separate container and clean the lamp base.
For added adhesion, you can lightly sand the base after you clean the lamp.
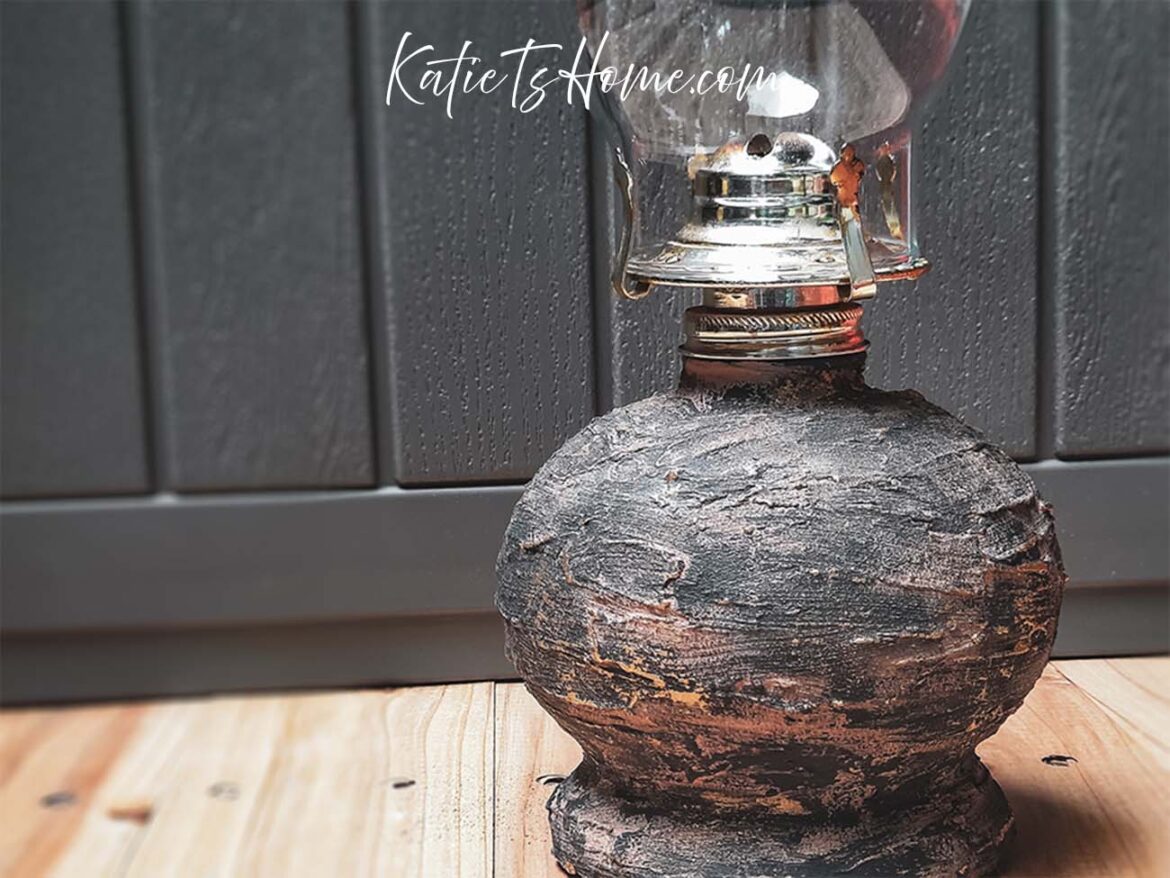
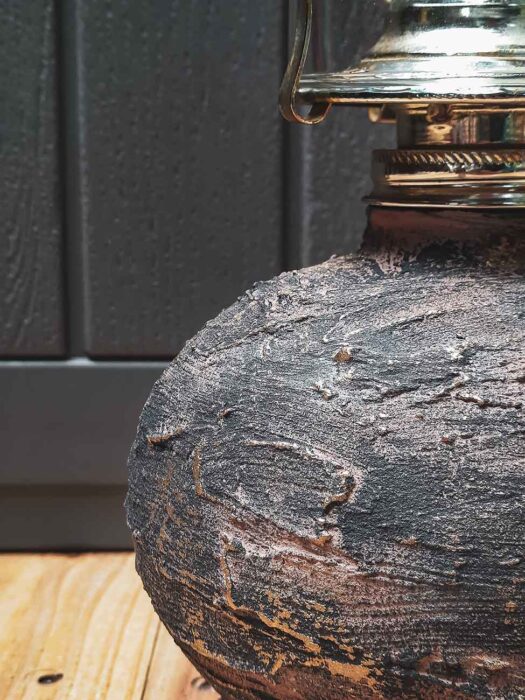
Okay, here is the important part! Painting the oil lamp!
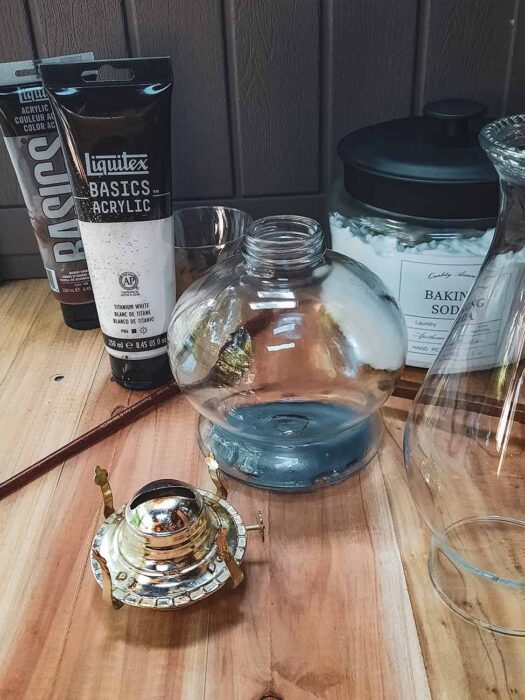
So, to get the textured look on my oil lamp, I added baking soda to the acrylic paint. I mixed brown and white together for the base.
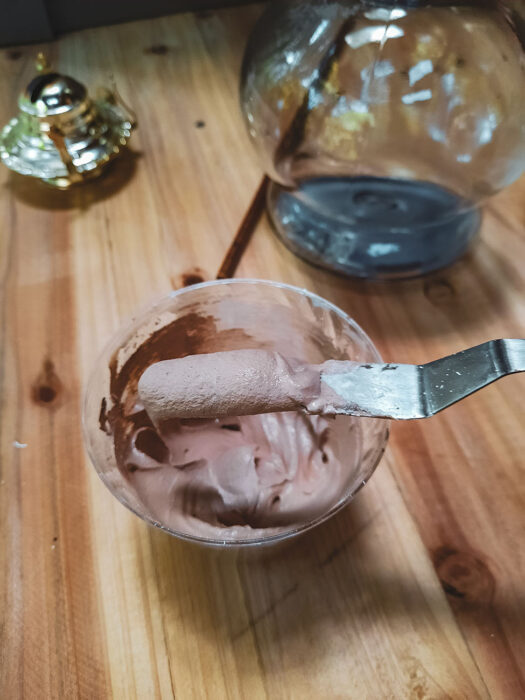
Take this opportunity to experiment with colors and textures with the paint. Just note that the paint will dry darker. Plus, the more baking soda you add, the thicker the paint will get. Start slow and add more as you go until you get the texture you’re looking for.
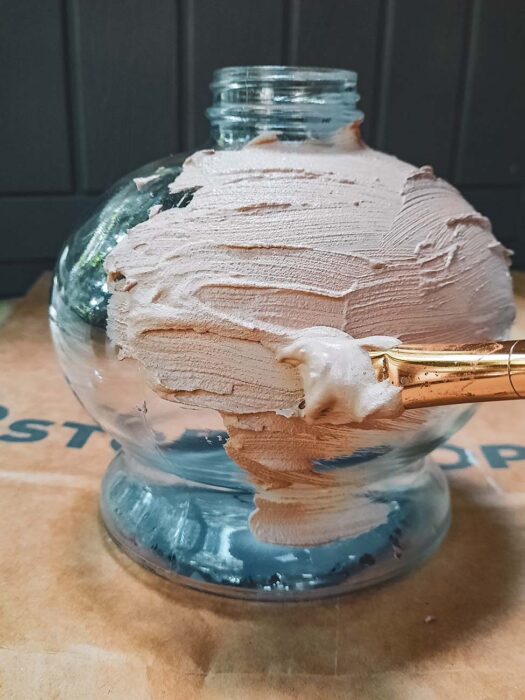
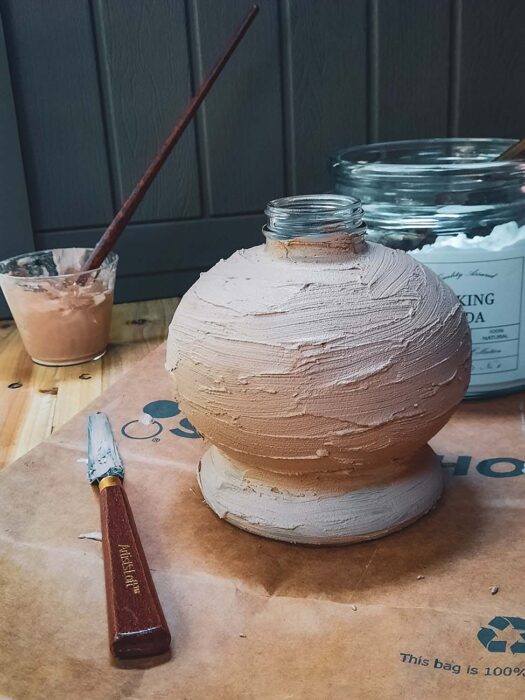
Once the first layer dried, I added a second layer of paint. I took the leftover brown paint that hadn’t been used and added white to some and black to the rest. I then layered these colors on the base of the lamp.
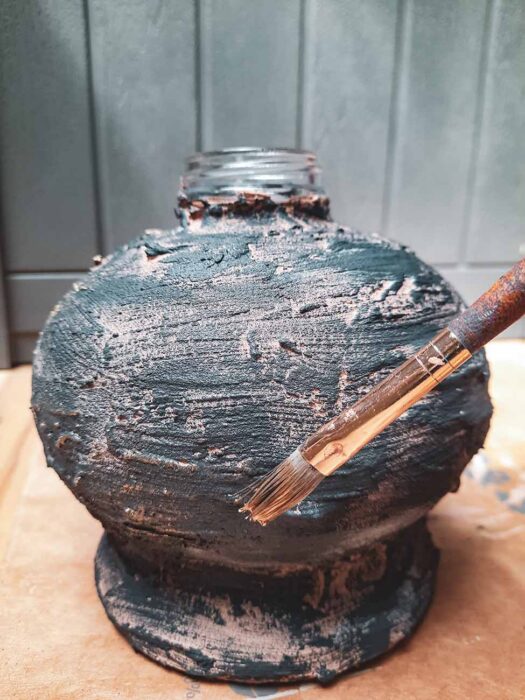
Once those layers were completely dried, I took gold spray paint and sprayed it into a disposable dish. The only reason why I chose spray paint was because it was the only metallic paint that I had on hand. If you like this layering and have metallic acrylic paint, that will also work.

So I took a brush and lightly brushed the gold paint perpendicular to the brush strokes to hit the high points on the oil lamp to give it that added sheen.

Get all digital downloads for a fraction of the price with this bundle deal!
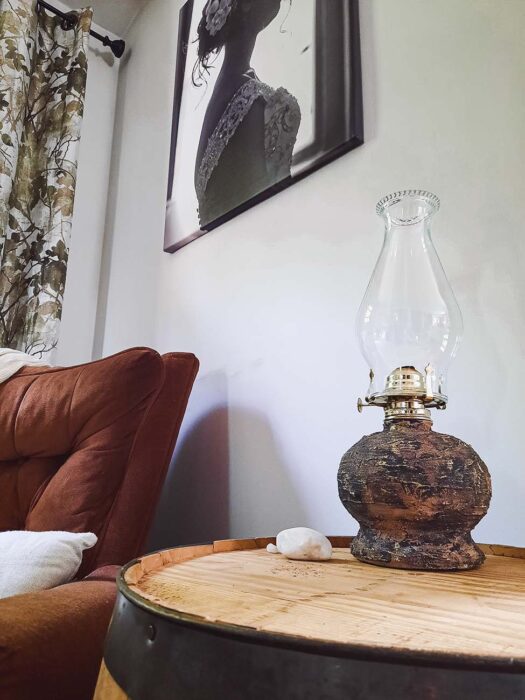
There you have it! A super easy DIY vintage oil lamp upgrade in 3 simple steps! It really couldn’t be any easier! If you want to see another post like this, check out what I did to this old cookie jar! I turned it into a decorative vase using plaster wrap! I know who knew right?!?!

Leave a Reply