Your cart is currently empty!


A rustic cottage spice rack drawer is just what every home needs to combat the overwhelming clutter of spice containers in that cabinet that doesn’t seem to be efficient with space. How many times do you go digging for that specialty spice that you know you have but can’t seem to find in the vast collection of spice containers? Well, those days are over because here, at Katie T’s Home, I’ll discuss the different ways to make spices on a budget, the pros and cons of a spice drawer vs. a rotating spice rack, and some easy recipes so you can have an organized spice rack! Oh, and don’t forget to get your FREEBIE Cricut label download at the end of this article. So, without further ado, let’s jump into this spice organization made easy!
This post may contain affiliate links, which means I’ll receive a small commission if you purchase through my links, at no extra cost to you. Please read full disclosure for more information.

Get all my favorite digital downloads today!
Updated July 23rd 2024
I also ask that you please leave your thoughts in the comment section below. I’m always trying to produce helpful content for my readers, and without knowing what you think, it’s hard to know what you find helpful/not helpful. So please leave your thoughts below!! 🙂

For my 32nd fun fact, I want to share that I am trying to do more canning this year! I plan on canning cucumbers this weekend to make pickles!
I’m super excited because I’ve wanted to do it for some time, but because I’m a beginner, it is a little nerve-racking. Obviously, I don’t want to mess it up, but I find the more I do it, the more comfortable I’m getting.
So, for the first step in this spice organization made easy tutorial, you’ll need spices to organize!
Now, use what you have on hand, but if you need to purchase more spices, I highly recommend you do either of these 2 things.
Buy spices in bulk or dehydrate them yourself.
Plus, it makes more sense to have nice containers like the ones I have if you are buying in bulk. Transferring the spices from the small container you buy at the store to a rustic container is more work for you in the long run, and for no other reason than it looks so much better.
So again, if you have the space to store bulk containers of spices, I highly recommend it. Plus, spices don’t go bad. They might get a little sticky and hard if exposed to humidity, but it’s not like you have to worry about using them in a set period.
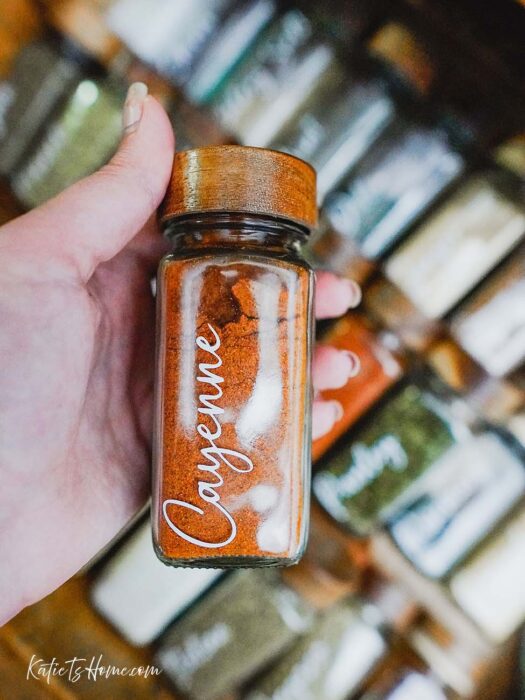
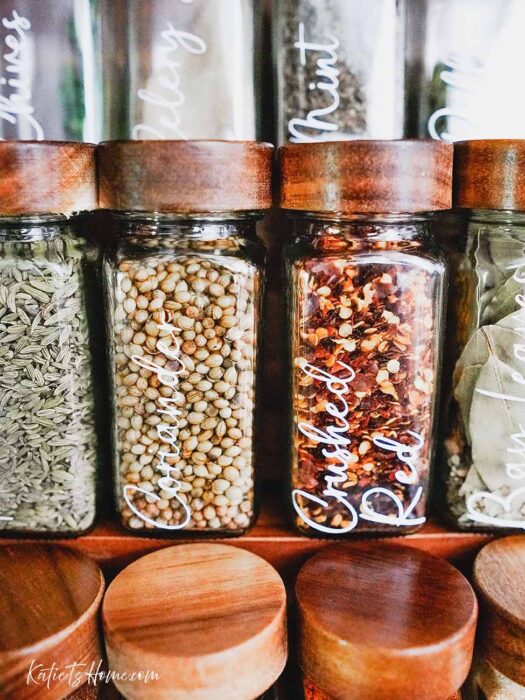
The two places where I primarily get bulk spices are BJs and Amazon. BJs is a good option for the classics, oregano, garlic powder, italian, parsley, and so forth. On the other hand, Amazon is good for the spices that aren’t quite as popular, like coriander, fennel, cayenne, or even crushed red pepper.
If you want to take it further and dehydrate your herbs to make spices, then that is also an affordable option. Especially if you grew the herbs in your garden!
However, dried herbs are convenient if you are making a recipe and don’t have fresh herbs on hand.
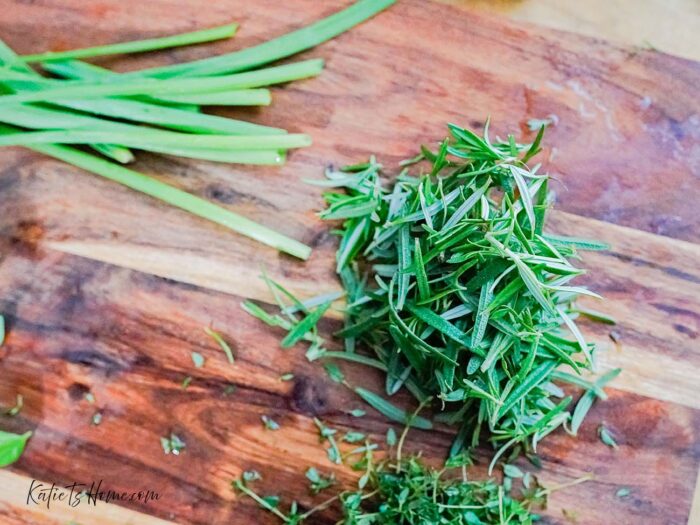
So, if you plan on drying herbs to stalk up in your spice drawer, then there are 3 methods that you can use. Just be mindful that the herbs will shrink because you’re removing the water content. Each herb will shrink more or less, so don’t be afraid to dry more herbs than you think it will take.
The 3 methods of preserving fresh herbs are hanging them, dehydrating them in a dehydrator, and/or microwaving them.
A few things to note. If you hang dry them, this may take 1-2 weeks. You’ll also want to hang the leaf part upside down. This allows the leaves to retain some of their coloring because the oils from the stem flow downward into the leaves.
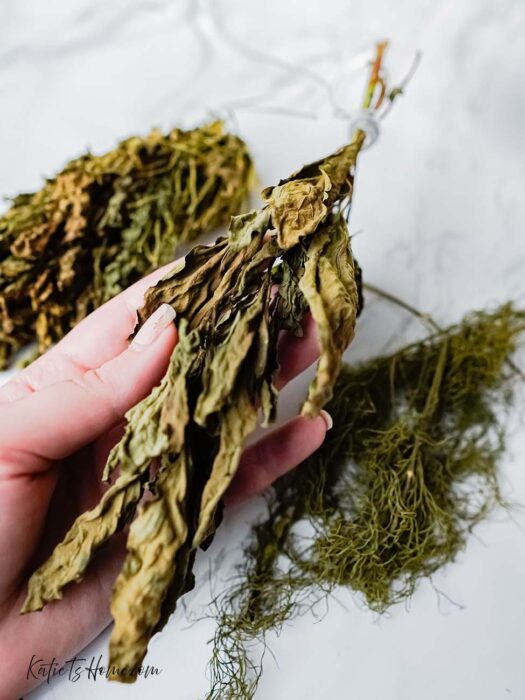
On the other hand, you can always dehydrate the herbs in a microwave or dehydrator. Both are quicker than hanging the herbs.
I used my ninja air fryer on the dehydrator setting to dry some of my herbs from the garden. This took about 5 hours at 115 degrees.
Meanwhile, the microwave was significantly faster. I put the herbs in for a minute and added 30-second intervals until they were dry enough. Again, the time will vary depending on the water content of that particular herb.
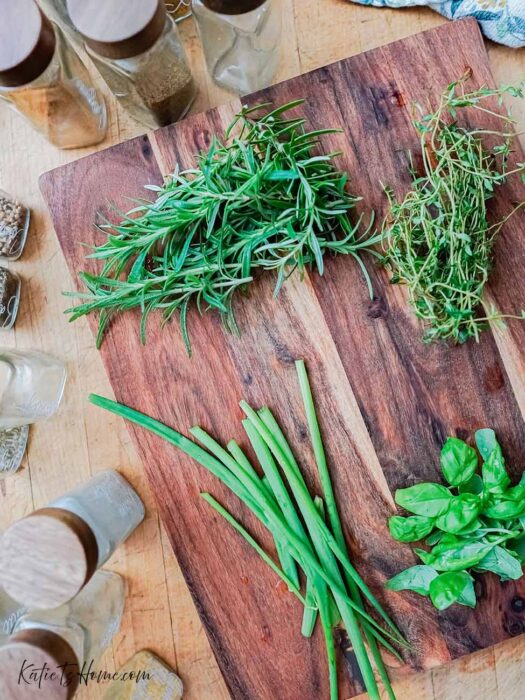
The benefit of drying your herbs compared to buying them at the grocery store is that the herbs retain more color, which means that they are of higher quality.

Get all digital downloads for a fraction of the price with this bundle deal!
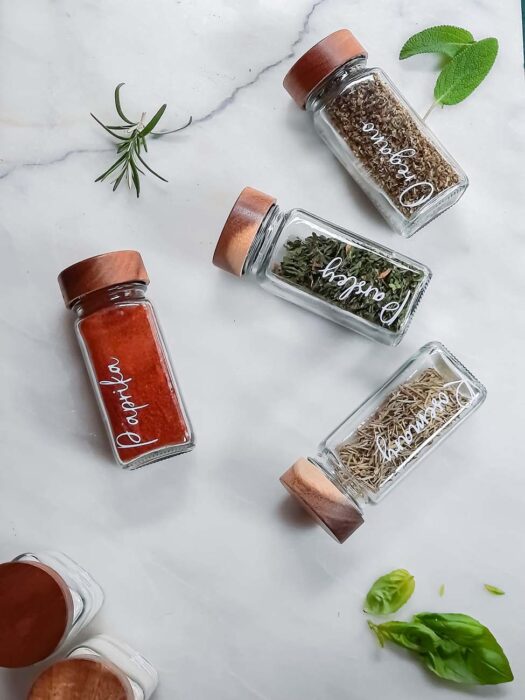
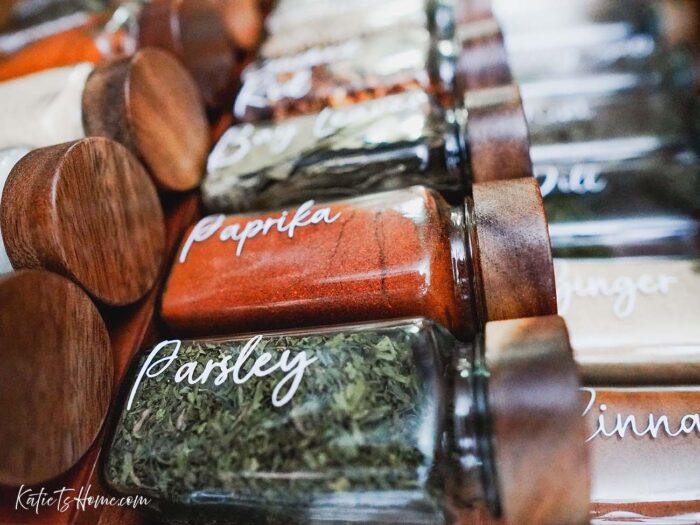
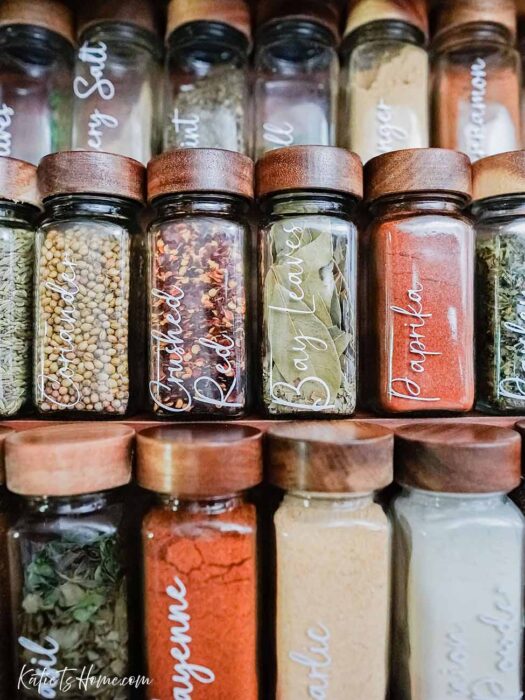
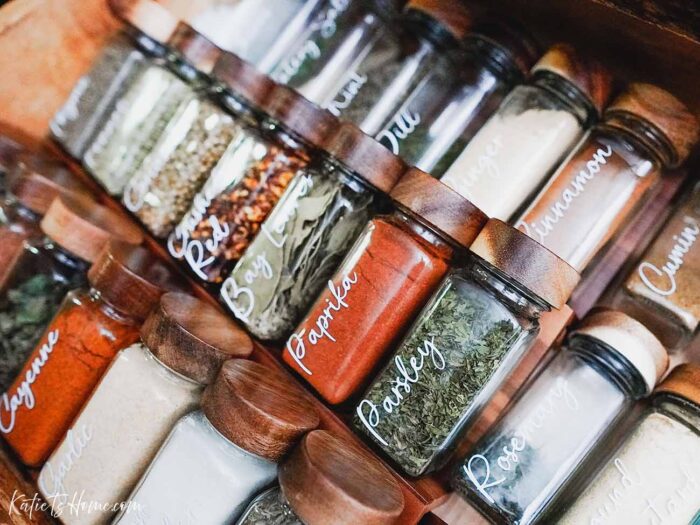
Spice organization is super easy and satisfying when you store the spice jars in a drawer.
I used to have a rotating spice rack because it was convenient to have the spices near the oven on top of the counter, not taking up valuable space in a drawer.
However, over time, the rotating spice rack was not ideal, and this is for a few reasons.
First, because it was too close to the oven. While this is convenient in some senses, it also creates more work. Because it was in the vicinity of where oil splattered when cooking, it meant it got dirty quickly.
The second reason is that cleaning it wasn’t easy due to all the nooks and crannies. Compared to a spice rack within a drawer, it’s just a flat surface. Wooden at that, so the metal doesn’t leave a streaky texture when wiped.
Lastly, because the spice rack rotated, if anything was behind it, it would shift or get in the way of rotating. It’s a minor issue, but an issue nonetheless. Having a spice rack in the drawer makes it super easy to access without anything else getting in the way.
The last step in your spice organization overhaul is to make your spices! This will also cut costs because you probably have ingredients to make some of the specialty spices, and you don’t even know it!
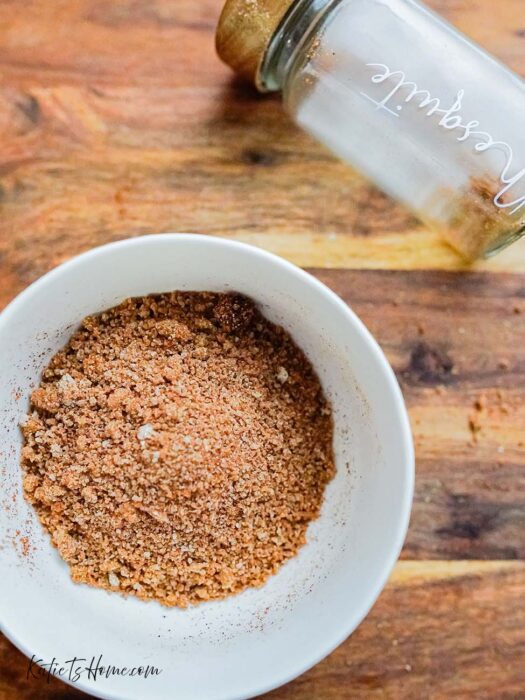
For example, you can make mesquite seasoning by combining spices:
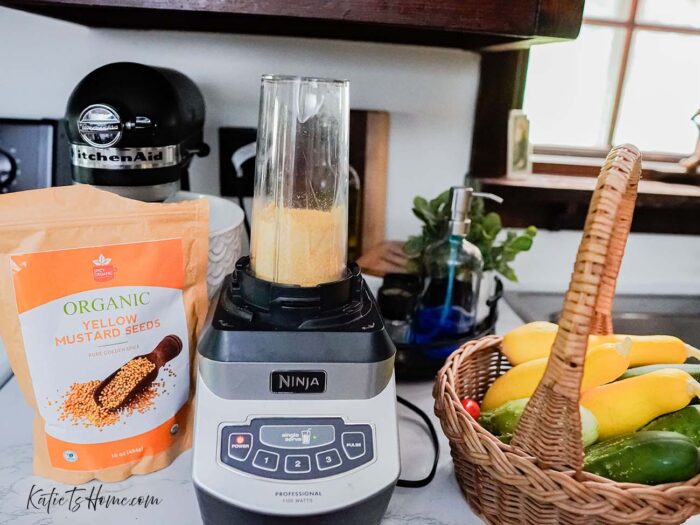
Another easy spice to make is to grind mustard seeds for a dry mustard powder.
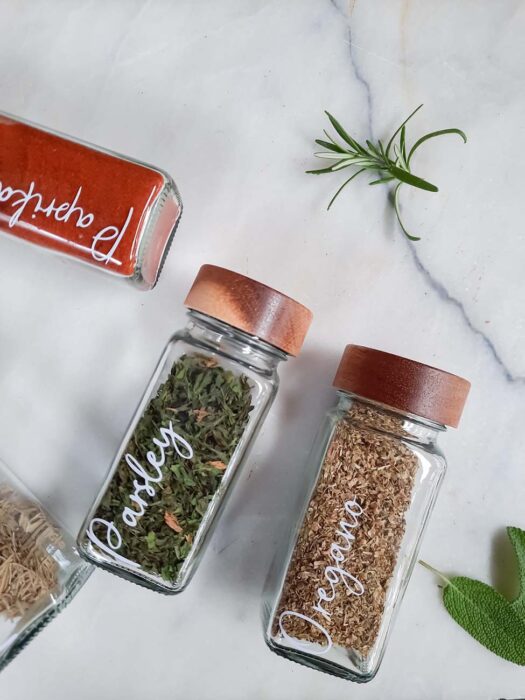
You can also make an Italian herb blend by combining parsley, basil, thyme, rosemary, and oregano.
So, as promised, your FREEBIE for this spice organization made easy guide! This freebie is for individuals who have a Cricut machine. If you don’t know what a Cricut is, I have a full article on everything you need to know about a Cricut before you make the purchase.
In full disclosure, this process is a little tedious. The spice jars I purchased came with labels, but I wanted something different. I love the font Rastanty Cortez from Microsoft Word, Excel, etc., but unfortunately, the Cricut design space doesn’t have a free font like this (at least not that I can find).
The other issue is the Word or Excel document needs to be transferred to an image for the Cricut design space to accept it. I am unsure if there is an easier way to do this, but I saved the Excel file as a PDF and opened it with Photoshop to convert it to an image.
Photoshop also has a function where I can layer the font to make it slightly bolder. I added this feature to the free templates. When I did this project myself, I found if I didn’t layer the font, it was too thin to cut, and when I bolded the font directly in Excel, it was too chunky looking. Layering the font via Photoshop allowed the text to be bolded enough to make cutting and weeding the vinyl easy.
Because Photoshop requires a subscription, I went ahead and put a template together for everyone to use, and it is FREE! If you are interested in picking a different font, photoshop offers a free trial (at least last I checked), so if you don’t like the font I chose, you can follow the steps I took to create your customized font.
For anyone interested in the free spice labels, I have separated them into two lists: the popular spices, and additional spices. I separated them this way to make it easy during the uploading phase.
The popular spice list includes the spices that I thought would be the most popular. The additional spice list is more uncommon but still used. Once you get to the uploaded step in this process, you’ll see why I thought it might be easier to separate it this way.
Just be sure to unzip the file when you download it and follow the traditional steps you would to cut something with your Cricut!
So there you have it! The tools and inspiration to take on a spice organization overhaul. I’m telling you, once you have finished, it is completely worth it! Comment below if you have done this to your spice drawer, and I will see you next time!
Love,
Katie

[…] transfer tape is needed when you want to put the vinyl on an item. I did a project recently where I customized my spice jars. I discovered I could double up and reuse the same transfer tape repeatedly. Before I would cut out […]
Leave a Reply